Let’s flame the flames of inspiration and show you how to build a fire pit from scratch, covering everything from material selection to safety tips.
Why build a homemade fire pit?
Besides the bragging rights, there are a few other reasons this project is perfect for you, your backyard, and your budget.
Make it your own
A homemade fire pit allows for a level of customization that store-bought options simply can’t match. Only your imagination can limit the design possibilities when you take a DIY approach. You can choose every element, from the type of stone to the size and shape, making your new fire pit a perfect fit for your backyard.
Boost your home’s value
Not only does a fire pit make your backyard the social hotspot of the neighborhood, but it also adds value to your home. Outdoor living spaces are a big selling point for buyers, and a well-designed fire pit can tip the scales in your favor when it comes time to put your home on the market.
Materials you’ll need for a DIY fire pit
Building a homemade fire pit doesn’t require many expensive materials. Here’s what you’ll need:
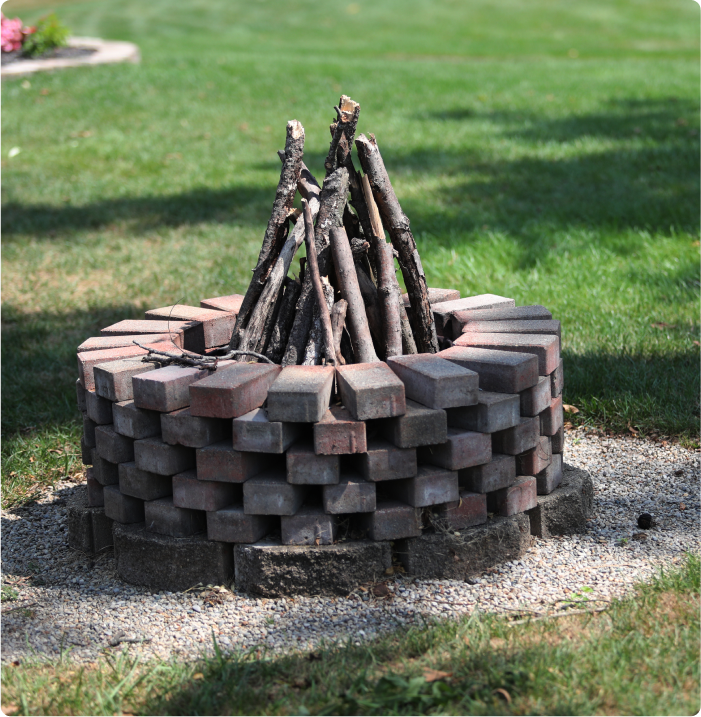
- Paver stones or fire bricks
- Gravel or lava rocks
- All-purpose or paver sand
- Metal fire put ring (optional)
Pro tip: Check local buy-and-sell groups or salvage yards for second-hand materials. You might score some great deals or even free finds on pavers and bricks.
Step-by-step guide on how to build a fire pit
Now comes the fun part—building it! Even if you’ve never laid a brick in your life, you’ll be just fine. Just follow along with our simple, 7-step guide on how to make a fire pit.
Design tips for a polished look
You’ve got the basic structure, but now it’s time to give your fire pit that wow factor. Here are some of our favorite finishing touches that will make your DIY fire pit entertaining-ready:
- Extend the area: Lay down extra pavers to build a patio base for your new fire pit, giving it a professional look and adding additional space for décor, like planters or outdoor furniture, safely away from the fire.
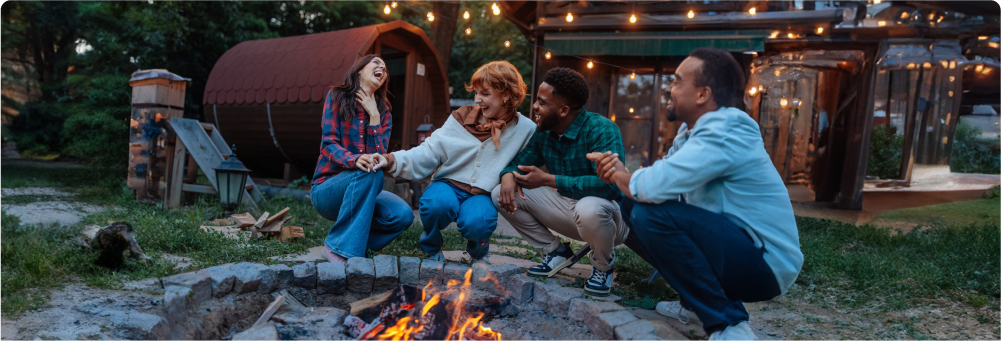
- Add some seating: Use weather-resistant chairs, build your own bench, or upcycle some wooden pallets to create a comfortable gathering space around your fire pit.
- String lights or lanterns: Set the right mood with some soft lighting. String lights overhead or place solar-powered lanterns around your new hangout for that cozy vibe.
Fire pit safety tips
Let’s review some safety essentials before tossing those logs and striking a match. After all, the last thing you want is for all your hard work to go up in smoke:
- Always have a water source or fire extinguisher nearby in case of emergencies.
- Never leave your fire unattended, especially around kids or pets.
- Consider installing a spark screen to contain embers, especially in windy conditions.
- Use dry, seasoned wood for burning. Wet wood can produce an excess of sparks and smoke.
- Always extinguish your fire when not in use.
The cost factor: DIY fire pit construction vs. professional installation
One of the most apparent perks of building your fire pit is the potential for significant savings.
- DIY Cost: $150-$300
- Professional install: $250-$2,200
Let’s break it down: if you hire a pro, you’re looking at a bill somewhere in the ballpark of $1,225. But when you take on this project yourself, you’re saving hundreds or even thousands of dollars for other improvements for your yard.
Frequently asked questions
1. Is it cheaper to build your own fire pit?
Yes, building your own fire pit can save you significant money. Depending on the materials, DIY fire pits typically range from $150 to $300, compared to professional installations that can cost anywhere from $250 to over $2,200.
2. How do you build a simple outdoor fire pit?
Start by choosing a flat, open spot in your yard that’s safe from overhanging trees or structures. Dig a shallow pit about 6-8 inches deep, then layer gravel or lava rocks to create a stable base. Stack fire bricks or pavers around the pit’s perimeter to build the walls. For a finishing touch, pour a layer of sand inside, which helps distribute heat evenly.
3. What should you put in the bottom of a fire pit?
The bottom of your fire pit should contain a few inches of gravel or lava rocks. These materials are inflammable and provide stability, heat protection, and drainage. Adding sand on top can further insulate the pit and help distribute heat.
Spark joy, not stress, with the comfort of an American Home Shield warranty
Fires and homes have something in common: they both need tending. While your new fire pit might be the hottest addition to your backyard, it’s just one part of your home.
Our home warranty plans are always there when needed, protecting your home’s vital systems and appliances. With coverage options tailored to your needs and budget, you can relax knowing that unexpected breakdowns won’t leave you out in the cold.
So go on, strike that match, gather your loved ones, and bask in the glow of your accomplishment. With American Home Shield, you can always count on having a little extra fuel for your home improvement fire.
AHS assumes no responsibility, and specifically disclaims all liability, for your use of any and all information contained herein.