Learning to DIY: How to Replace the Attic Ladder
  1. Home Warranty
  2. Blog
  3. Repair & Maintenance
  4. Learning to DIY: How to Replace the Attic Ladder
Attic ladder

Learning to DIY: How to Replace the Attic Ladder

Attic ladder

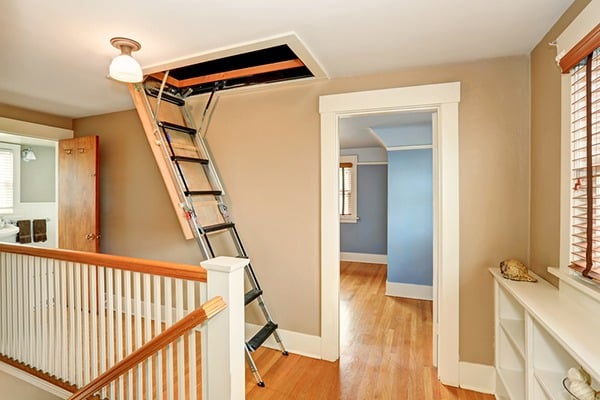
Do you use your attic for storage, but realize that your attic stairs need to be replaced? Learn how to do it yourself with this easy-to-follow tutorial.

Whether you’re going through an organization frenzy or needing to put holiday decorations back in storage, the attic plays an important role in your efforts. So what do you do when, instead of making headway, you find yourself with broken attic stairs, or worse, you can no longer access the attic? You learn how to replace the attic stairs.

Here are the details on how to replace an attic ladder, including how to select a new one and how to install the ladder components yourself — potentially saving you a lot of money.

Note: This article describes replacing an existing attic ladder. If your home doesn’t already have one or you’re wanting to make changes to your existing opening, you may want to enlist the help of a professional installer. Also, if you are not confident in your sawing, squaring and aligning skills, consider hiring a professional.

 Before You Get Started

When it comes to installing an attic ladder, you shouldn’t just grab a new one off the shelf and go to town. Rather, you first need to measure your existing ladder to determine the size that your new one needs to be. Measure the rough opening, as well as the distance from the ceiling to the floor. Then, enlist the help of a friend or relative and gather the following supplies:

- New, preassembled ladder in desired material and with desired features

- Carpenter square

- Drill bits, according to the manufacturer’s instructions

- Hammer

- Hacksaw (for metal steps)/Wood saw (for wood steps)

- Pencil

- Stepladder

- Tape measure

- Wrench, according to the manufacturer’s instructions

- Phillips-head screwdriver

- Deck screws, according the manufacturer’s instructions

- Support boards, according to the manufacturer’s instructions

- Shims

Be prepared that you could end up spending some time taking down your existing ladder components, depending on how badly damaged the ladder is. In fact, this may be the most time-consuming part of the whole process.
Thinking about coverage?

Security for your home. Protection for your budget.

 DIY Attic Ladder Installation

When the old ladder is removed, proceed with the following instructions:

  1. Remove the ladder’s packaging, except for the tie that holds the stairs together, and check to make sure the new ladder is fully assembled and doesn’t have any blemishes.
  2. Remove any trim or hardware around the existing attic opening, verify that the opening is in good repair and double-check your measurements to ensure you’ve purchased the correct ladder size.
  3. Install the support boards with the deck screws to each header end of the opening, according to the manufacturer’s instructions. These boards are temporary and will only be used to support the ladder while you are installing it.
  4. Attach the pull cord to the attic door according to the manufacturer’s instructions.
  5. With one person in the attic and one on the ground, lift the ladder through the rough opening and let it rest on the two support boards. Slide the ladder so that the hinge side is tight against the back header board, being careful not to place any weight on the ladder until it is fully installed.
  6. Center the ladder in the rough opening and temporarily secure the hinge side with two screws to the back header board. These screws should only go through the wood ladder frame, not through the metal hinge.
  7. Open the ladder door from below by pulling the cord, keeping the stairs bound together.
  8. Measure the two diagonal dimensions of the opening from above the ladder. If they are within one-eighth of an inch of each other, the opening is square. If they aren’t, add shims to the corners to adjust the frame. Drive screws through the shims, to hold them in place.
  9. Permanently install the ladder by drilling the necessary holes and screwing in the appropriate screws to the hinge and mounting plates that are preassembled on the ladder frame, according to the manufacturer’s instructions.
  10. Make sure the door closes easily and without interference. If necessary, adjust the shims, to ensure a tight fit when closed.
  11. For safety purposes, remove the tops of any shims that extend above the frame.
  12. Remove the temporary support boards.
  13. Measure the height from the ladder frame to the floor to determine the length that the stairs need to be.
  14. Remove the tie holding the stairs together, measure and trim the stairs with the saw, if necessary, according to the manufacturer’s instructions.
  15. If applicable, attach the ladder feet according to the manufacturer’s instructions. When the ladder is fully extended, the hinges should have no gaps, and the feet should be flat on the ground.
  16. Re-attach any trim around the attic opening.
  17. Caulk and insulate around the opening, both above and below the ladder, to avoid air loss and access for pests.
  18. If applicable, paint the new ladder door.
  19. Enjoy your new ladder!

Looking for pictures of the process? Click here.

 Related: Best Money-Saving DIY Home Improvement Projects for the New Year

Share:

Was this article helpful?

AHS assumes no responsibility, and specifically disclaims all liability, for your use of any and all information contained herein.

American home shield short logo mark

Don't worry. Be warranty.

Have a plan for your home when things don't go according to plan

Shop Home Warranties

Staging