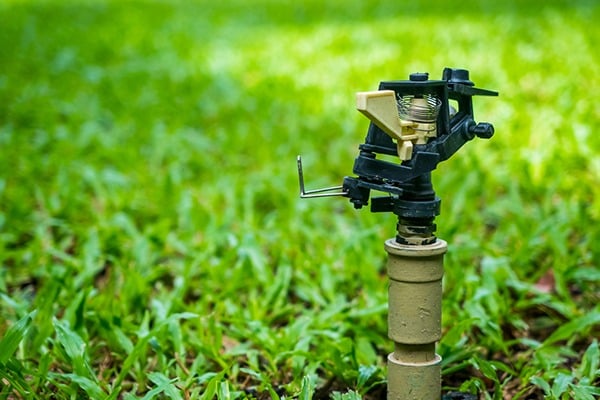
Sprinkler Valve Repair & Replacement

Discover the signs of a broken sprinkler valve and how to repair your broken sprinkler valve from the Home Matters home repair & maintenance experts.


Discover the signs of a broken sprinkler valve and how to repair your broken sprinkler valve from the Home Matters home repair & maintenance experts.
Automatic irrigation systems have a lot of moving parts by design, all of which need to be in good working order for the system to be effective in delivering the water that your lawn and garden need. Valves are important parts in any sprinkler system because they control the water flow by opening and closing. If your in-ground sprinkler system isn’t working properly, a malfunctioning valve could be the reason. After you’ve checked to make sure the water supply is adequate and the controller is set properly, you may want to do some DIY sprinkler system repair reconnaissance:
Signs You May Need a Sprinkler Valve Repair
- Notice low water pressure in your yard or in your home
- Notice if the sprinkler head is not spraying with as much force
- Check lawn for standing water or for any sections that may seem wet and marshy
- If this is the case, check for any debris that is stuck in sprinkler valve - you may be able to simply clean out debris rather than repair or replace the valve
Checking for Damaged Sprinkler Valve Causes & Repairs
Before determining whether to repair your sprinkler valve system, you must first check to see if there are any damaged wires or coils. The following steps will help you determin which, if any, parts could be the root cause of your malfunctioning sprinkler system.
1. Finding a Sprinkler Valve
Because many irrigation system valves are located underground, trouble with them can be difficult to identify. If you don’t have a diagram of your sprinkler system design, there are a few different ways to find a sprinkler valve, such as looking near the water source, backflow preventer, around the perimeter of the house, and in shrubbery. Once you’ve narrowed down the area, you can use a screwdriver to carefully probe the ground to find the equipment. You can also ask your local home store about buying or renting a solenoid activator or a valve detector.
There are also different valve types, such as mechanical, electric, hydraulic, or a combination. Before you start working on your valves, consult your installer to find out what kind of valves your system uses.
When you locate the valve, inspect it carefully. In addition to looking for debris, check the valve seat and gasket for any tears or deterioration that could be interfering with its proper operation.
Thinking about coverage?
Security for your home. Protection for your budget.
2. Check Your Sprinkler System Wires
Sometimes the source of valve problems may actually be an electrical or wiring problem. If you think this might be the situation, check to make sure that all the wires are making good connections and contact. Look for cuts, breaks, damage, or fraying in the wires. Always shut off the power source at the control box and take extreme care when working with any electrical component. Call a qualified electrician if you have any questions or are not sure how to proceed.
3. Check Your Solenoid Coils
Solenoid valves have coils of electrical wire that are magnetically maneuvered by your system’s controller to open and close. If there’s a problem with this type of valve, you may be able to just replace the solenoid rather than the entire valve.
How to Replace a Sprinkler Valve
1. Turn off the power and water. To replace a solenoid sprinkler, turn off the water to the system and turn off electricity to the system at the control panel.
2. Temove the solenoid connectors and assembly. Locate and open the valve box. Unscrew the solenoid connectors and remove the assembly.
3. Reattach the solenoid. Reattach the repaired or replaced solenoid with waterproof wire connectors to the assembly with a screwdriver, and connect to the main valve.
4. Turn the power and water back on. Turn the power back on and slowly turn the water back on so that you don’t cause any valve damage if the pressure spurts on too quickly.
Prevent Sprinkler Valve Problems with Regular Lawn Care
To properly maintain an automatic irrigation system, it’s important to pay attention to both the system and to your lawn and garden. If you notice areas in your lawn and landscape that are either wilting, losing their color or that seem to be receiving too much moisture, take note of the zone and do some sprinkler system troubleshooting.
In addition to keeping an eye on your turf and landscape plants, make a point to regularly observe the different zones of your sprinkler system while it is in operation. This will give you an opportunity to spot or repair sprinkler valves and other parts before they have a chance to do any damage to your grass and plants. Preventative maintenance checks may also help you hold down sprinkler system costs by saving money on wasted water due to leaks and other operational issues.
Related: How to Effectively Water Your Lawn
See how a plumbing protection plan can help with covered repairs.

AHS assumes no responsibility, and specifically disclaims all liability, for your use of any and all information contained herein.
Have a plan for your home when things don't go according to plan
Shop Home WarrantiesStaging